We generally do not use written workbooks in later grades for any sort of reading comprehension questions as we often have multiple students working through material at the same time (meaning I have to read through multiple pages) and most of them would rather type than write by this stage because it is so much faster. When I took online college classes a couple of years ago, my professors used forms to capture everything from multiple choice answers to long answer essay-type questions. Many of these even had instant auto-grading features, which enabled me to know right away if I was on track with my learning. I thought that there surely must be some kind of Google option for me as a busy homeschool mom to quickly capture information from my students and allow them to easily answer questions from reading wherever they happened to be with their laptops, then submit them to me with the click of a button.
Enter Google Forms! These little things have saved me countless hours. It’s true that with younger children we are aiming for less screen time, including time spent doing school work on devices. But with only one elementary student and the rest of my students being in middle and high school, we utilize many different kinds of electronic learning and reinforcement, and this has made my job managing many students a lot easier. I am not using Google Forms even close to its incredible capacity, but I will walk you through how to set up a short answer lesson. I am certainly not a professional, but this basic overview should get you started if you need a time-saver option.
In this example, I’m using Notgrass history and civics review guides.
Step 1. Go to Google Drive and click New, then Google Forms. Name your quiz, guide, chapter, or unit. Notgrass history courses have 30 units with one unit being completed each week, in addition to literature readings over the course of several weeks, so I will have a total of 30 different forms. Each unit has five lessons, and those lessons will all be included on each unit form that I have my students submit to me at the end of each week.

Step 2. Go directly to Settings and scroll down to Defaults. Because I have multiple students using these forms, I want their verified email addresses to be collected (otherwise there is no way to know who sent which responses when you’re gathering more than one student’s answers). I also want to make the questions required. Once you set up these defaults, you will not have to adjust them for every single unit and quiz for every form you create. Several years later, when your younger students are using the same guide for the same course, you will thank your past self for having the foresight to have already set them up. You’re welcome.

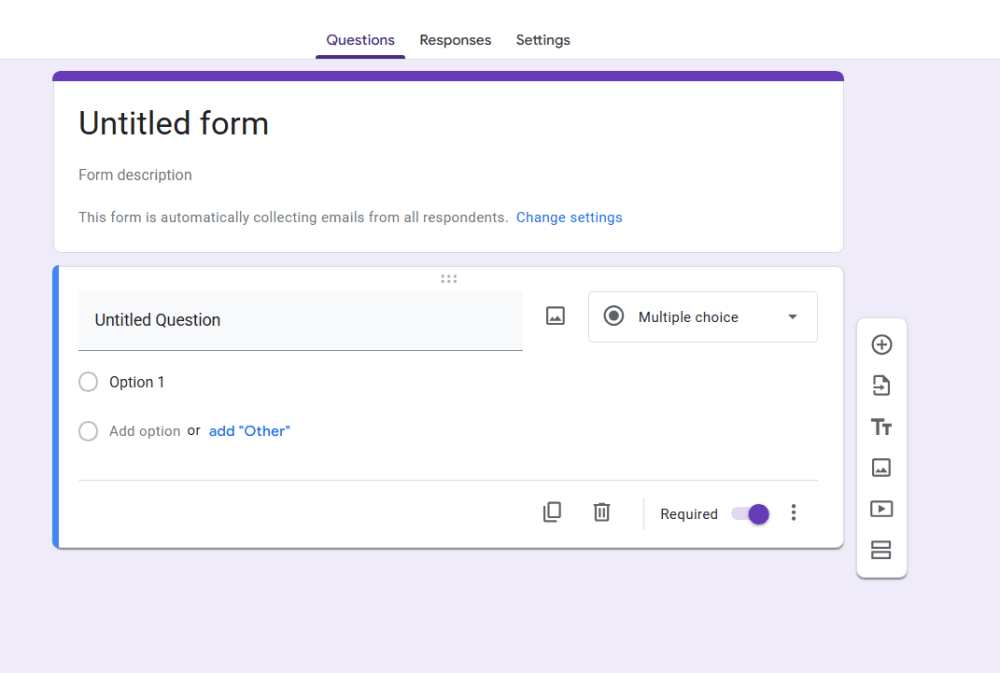
Step 3. Start putting in your questions by typing them in and clicking the plus button on the toolbar as you go. By default, you will have one section at the top, which I usually name for the unit we are studying along with instructions for completing the assignment. I will then add a section for each lesson (there are five per week) and I will add questions to each lesson. The default is Multiple Choice questions, but I always use the dropdown to select Paragraph as the type of question because that allows students to type in a longer response, including short essay answers.

Step 4. You have the option to import questions from another document if you have them stored somewhere else (it’s in the toolbar to the right of the form). If you want to retype all your review questions from an instructor or review guide into the browser and save those, have at it.
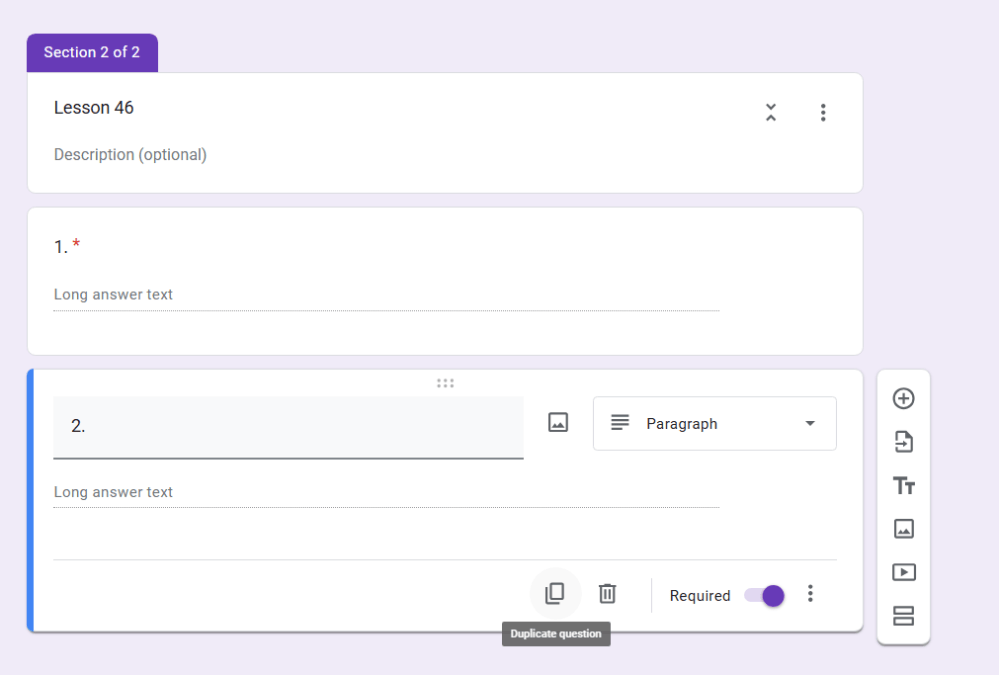
Embarrassingly, in my old OCD days when I had more time and more perfectionism, I would have painstakingly re-typed every question from the guide. It is God’s mercy that I didn’t discover Google Forms until my lovely perimenopause season hit me full force a couple of years ago (IYKYK). I DO NOT have the kind of time or emotional energy now that I once did, so I duplicate the first question however many times I need to, then edit the numbers. You can even duplicate whole sections and then just change out the lesson numbers as you go. My kids are smart enough to figure out how to find the questions in the unit and lesson they are supposed to be on and go to that page in the review guide!
Step 5. If you have additional readings from other sources or need to add a section for literature questions at the end of a unit, you can create an entirely separate form, or simply add an additional section to the form you just created. In this example, the reading came after the questions for the first lesson of the week (Monday) so I put it after those regular unit questions but before Tuesday’s questions. Play around with reordering the sections as needed. Google makes it super easy.

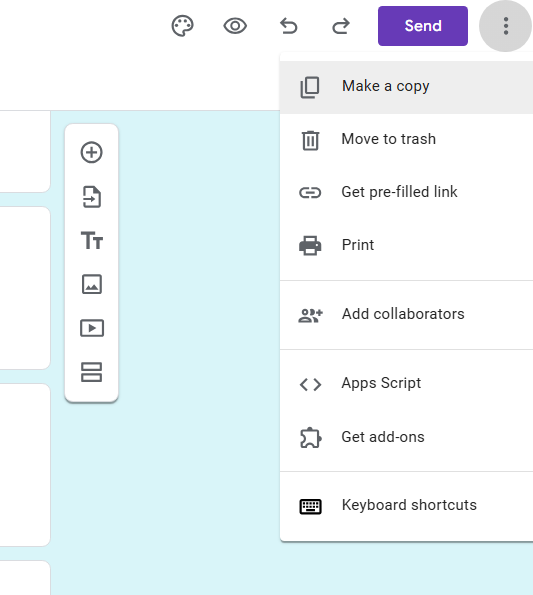
Step 6. You’re almost done with creating. Click Publish and then you can send the form to your students. I usually email it directly to them, but you can send a link as well. Change your options as needed. Once that is completed, you can duplicate the entire form. Change out the information, update the unit and lesson numbers, and save as a new form for every unit in a course. I was able to create a full set of 30 forms very fast this way.
Step 7. Once your students have filled in the form with their answers, you will be able to quickly scan and gauge comprehension. They do not need to email you back – the form will automatically collect answers once they hit Submit. Click on Individual to see all the answers submitted by a single email, and Summary to see at a glance all the submitted answers. I often use Summary view first to easily see who grasped the concept and if anyone needs to get more information and/or resubmit answers. While you can spend time creating auto-grading and pre-selected answers, I have not had the need to complete that extra step for these forms. I could send all the student answers into a separate Google Sheet as well, though we have not used that option either. This method has saved me so much time in our Notgrass courses alone.


With the immense amount of reading and writing that is being done in the upper grades, I am grateful for any tools that make it easier for me to efficiently check in with all of my students’ learning. I have found that the more independent they become, the more I have to set aside time for assessments and helping them set up and organize their assignments. As we have transitioned from oral narrations with read-alouds in early days, to written comprehension questions answered mostly independently in the logic stage, to writing persuasive essays in rhetoric classes in high school, I have still found that discussions around the dinner table are the most memorable way to talk deeply about the things we’re learning. Even if you only use forms like this to keep accountability with students (i.e. ensure they are actually doing their reading), remember that as homeschoolers, we are pulling what we’re learning into all areas of normal life. The heart of this rich education is to store up a treasure of good, true, and beautiful ideas that will inform life for many years to come.
